Friday, August 5, 2011

Squares to Cherish - Moxie Fab Trigger Tuesday

Once again Cath has come up with a most amazing Trigger Tuesday challenge for us!
                                                             Isn't that just beautiful??
It made me think of my childhood. My Mother made those granny squared Afghans all the time...I was always snuggled up on one. The best part was sticking my toes thru...shhh, don't tell mom!!

I took my inspiration from the "squares with circles in the center" shapes and the beautiful colors. Hope you like what I came up with!
 And for a peek at the inside...

Supply List:
  • card stock - black, blue & white
  • DeNami Design stamps - ornamental flower stamp set & elegant floral wreath
  • Denami Design - quickie glue pen
  • DeNami Design - xtra fine glitter
  • Stickles - star dust
  • DeNami Design - grosgrain ribbon
  • TomBow Markers
  • pop dots
  • glue dots
  • tape runner

Thanks for stopping by, hope to see you back again soon!

Please leave me a comment and let me know what you think....good or bad....or even better - what would you have done differently??...crafty minds wanna know!

Thursday, August 4, 2011

Halloween fun

Cheeky has me inspired with all of her wonderful halloween creations and wishes for cooler weather! Don't ya just LOVE these darling versitle stamps?!?!


And for a little closer look....

I only used ink to stamp with and a marker for the hill outline and ghostie, otherwise everything was done in chalks...I love the soft effect it gives.

Stamps:
H84 three houses
F207 three winter trees
E145 friendly ghost
E137 small cloud

Please leave me a comment and let me know what you think....good or bad....or even better - what would you have done differently??...crafty minds wanna know!

Tina M

Wednesday, July 27, 2011

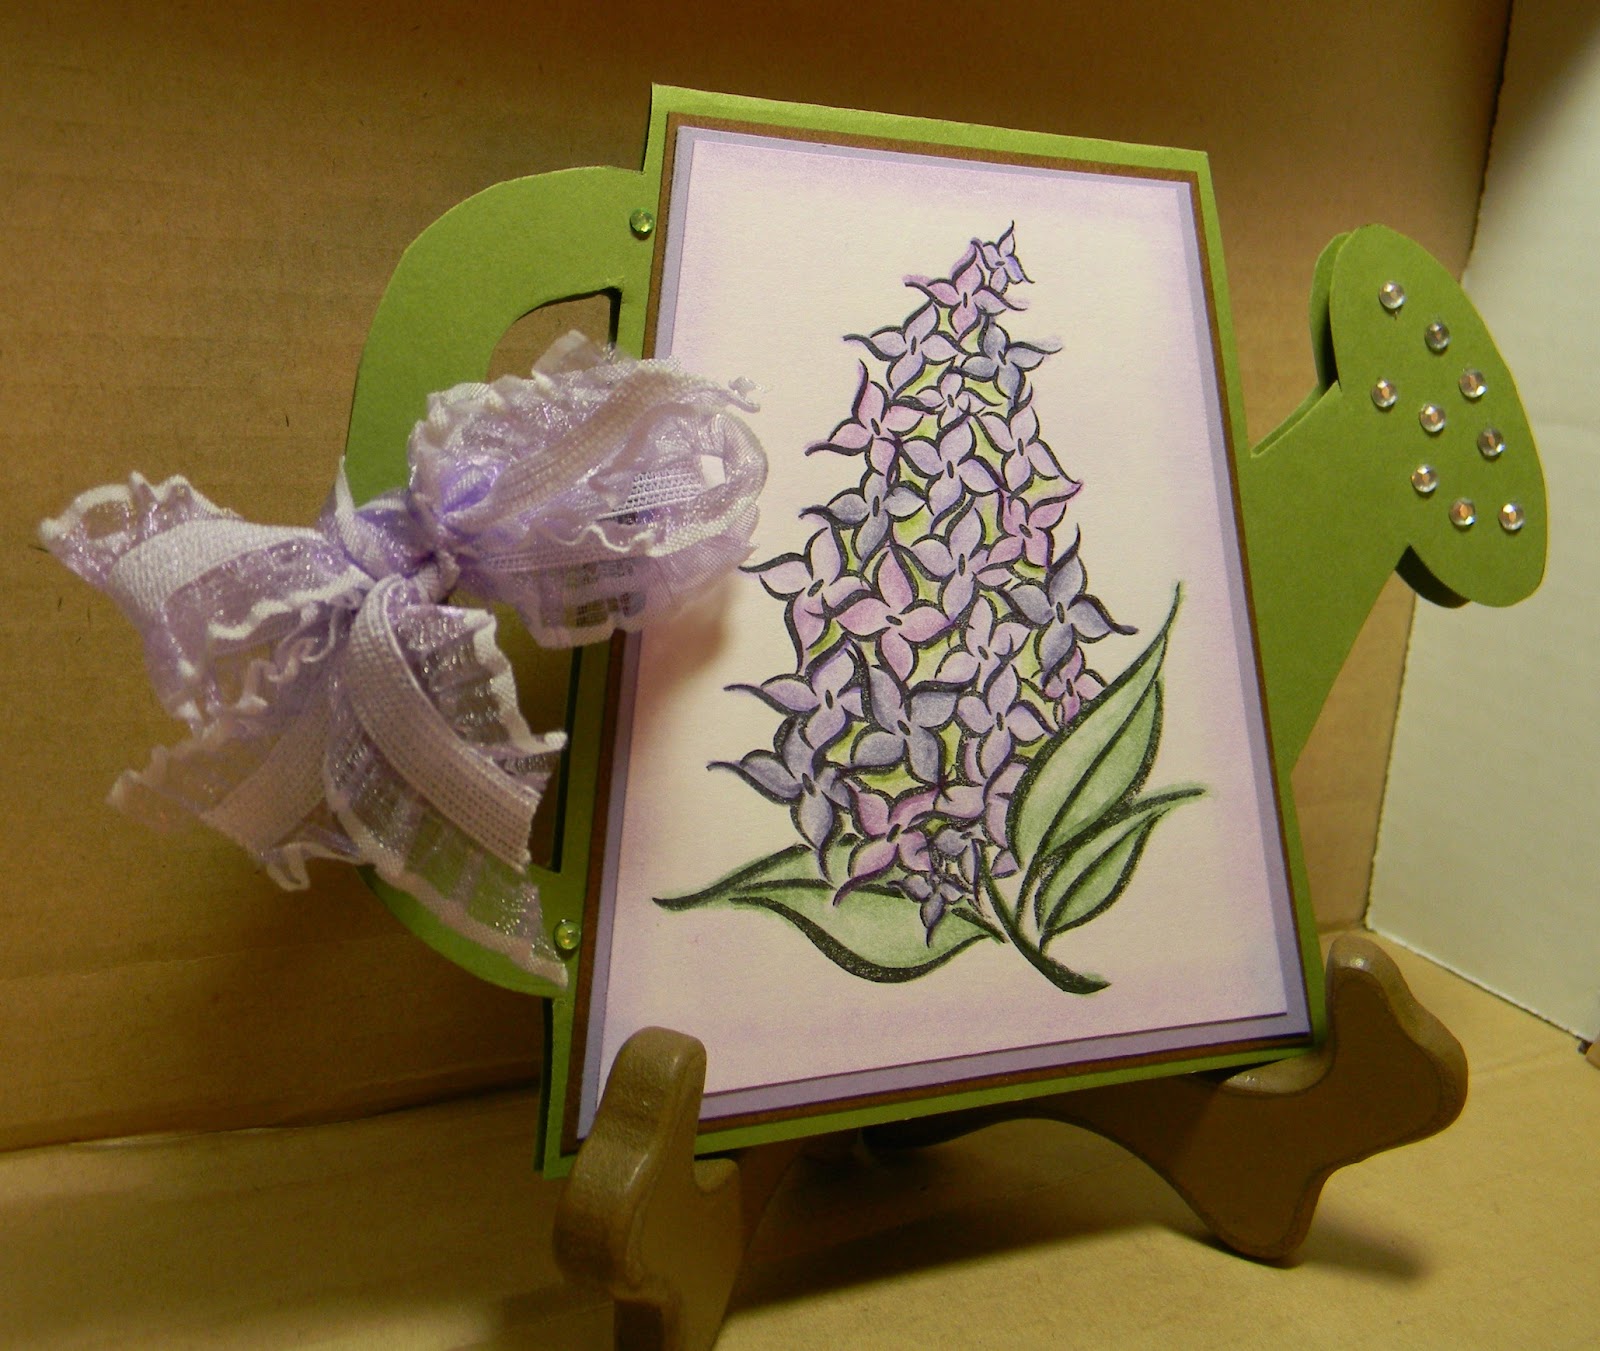
botanical challenge - card #2

The wonderful people over at Moxie Fab World and given us yet another awesome challenge...fanatical about botanical! Cath is trying to get us thinking in a whole nother direction when it comes to the trendy botanicals. We see the beautiful botanical theme everywhere but if you’re like me, when you use botanicals in your card making it usually ends up more on the whimsical side. Making a botanical themed card that IS NOT whimsical…now that’s a challenge!

Isn’t it funny when you have an idea in your head, but when you sit down to sketch it out or to make the card, your run in a whole other direction? When I saw this challenge and gave it a good thought, I pictured a classic black and white card with an acetate overlay where I would place a pretty little rub on that I’ve been hording and maybe attach it with a pretty ribbon. When looking for the stamp that matches the rub on that I wanted to use, I pulled out several other “floral” stamps…they just called to me, I had to switch gears…I ended up making 2 separate cards that were NOTHING like my vision.


Items Used:
Color: Roseart colored pencils, Stampin Up lavender Lace chalk
Stamp: DeNami Design #P75 Lilac
Bling: The Paper Studio
Ribbon: Hobby Lobby
Other: Gamsol
Cardstock: green, chocolate, purple, white
Pattern: May 2008 Card Maker Magazine

Please check out my other card and that of the awesome folks over at Moxie Fab World!

Please leave me a comment and let me know what you think....good or bad....or even better - what would you have done differently??...crafty minds wanna know!

botanical challenge - card #1

The wonderful people over at Moxie Fab World and given us yet another awesome challenge...fanatical about botanical! Cath is trying to get us thinking in a whole nother direction when it comes to the trendy botanicals. We see the beautiful botanical theme everywhere but if you’re like me, when you use botanicals in your card making it usually ends up more on the whimsical side. Making a botanical themed card that IS NOT whimsical…now that’s a challenge!

Isn’t it funny when you have an idea in your head, but when you sit down to sketch it out or to make the card, your run in a whole other direction? When I saw this challenge and gave it a good thought, I pictured a classic black and white card with an acetate overlay where I would place a pretty little rub on that I’ve been hording and maybe attach it with a pretty ribbon. When looking for the stamp that matches the rub on that I wanted to use, I pulled out several other “floral” stamps…they just called to me, I had to switch gears…I ended up making 2 separate cards that were NOTHING like my vision.


After I had the card all made, I realized I should have inked the edges of the sentiment panel…I hate when that happens, but it’s the way it usually goes for me, lol!


Items used:
Color:  Versa color Brown, Staz On Timber Brown & Saddle Brown, Tombow Marker #969

Stamps:  sentiment by Inkadinkado, botanical ferns from Stampin Up, antique cracking back ground from Stampin Up

Bling: The paper Studio

Ribbon: Michaels

Card stock: Cream and chocolate

Don't forget to check out the other card I made and those of the other folks over at Moxie Fab World...thanks for stopping by!

Please leave me a comment and let me know what you think....good or bad....or even better - what would you have done differently??...crafty minds wanna know!

Saturday, July 23, 2011

Vibrant Flowers (informal) Color Challenge

Once again the gals over at DeNami Design are trying to get us thinking outside of the box with yet another awesome color combo.

Magenta/Fuchsia, lime green, leaf green, chocolate and white – Hmmm, what a challenge! I would have never tried this combo on my own…woot for Paulina for pushing us! I just love what she came up with so I thought I’d join in on the fun! There are no prizes for this challenge...but don't let that stop you from joining in!


For this “challenge”, I decided to try something I’ve never done before…well, actually, a couple of somethings. If you know me at all, you know that I am the queen of layering…I can layer until the cows come home (just don’t ask me to make a simple unlayered card…can’t be done!). Well, I decided to switch up my layering a bit. I made panels from the magenta and lime green then put them side by side in reverse order…I love the effect it gave me.


I know, my picture taking skills blow...don't judge lol!! (Paulina, I think pic taking 101 would make a good video tuitorial...hint hint) I didn’t add a sentiment…was thinking that this would be a good “all occasion” card to have on hand and that I could always tuck a little tag up under the bow with a sentiment later when I decide to use the card.

Have you noticed the cute little ribbon yet? Have you noticed something special about that ribbon…your eyes are not playing tricks on you…yes, that IS a DeNami stamp! How adorable is that??? I’ve heard of ladies doing it, but have never stamped my own ribbon before, thought I’d give it a whirl. LOVE it and I predict much much much more stamped ribbon in my future!

I used card stock in all of the challenge colors…a white card base, magenta & lime green panels, lime green and magenta & leaf green scallop borders with chocolate peeking out between the scalloped layers. Everything is stamped in a chocolate color. The leafy swirls are all colored in with leaf green and the lilys are in magenta. I finished off all the swirls and lilys with a quickie glue pen and Xtra Fine Sparkles.

I had so much inspiration from Paulina’s card and I hope that you got even a tiny bit of inspiration from my card…

Thanks for stopping by!!

Items used:
Card stock – magenta, white, lime green, leaf green & chocolate
Colors – Staz-on Timber Brown, Tombow markers
Ribbon – white grosgrain
Other – quickie glue pen, Xtra Fine glitter, pop dots, tape runner and glossy accents (as glue)

Wednesday, July 20, 2011

Trigger Tuesday - Moxie Fab World

Isn’t it just yummy!?!?!  As soon as I saw the picture for the Tuesday Trigger challenge over at Moxie Fab World I knew I just had to make a card…I was just too inspired to sit out!

The challenge is really our interpretation.....
When I look at this darling little coat framed by that pretty soft pink background, so many things come to mind… the back ground and the style of the coat is romantic, posh and sophisticated, but the color of the coat…ohh my… how daring, flirty and sassy!  It immediately made me think of the “Mimi” line of stamps from DeNami Design. Mimi is all that aaaand a bag of chips (insert snapping of fingers). She’s truly a moxie kinda gal ;)    I just acquired the perfect Mimi stamp for this challenge and couldn’t wait to get home and make this card!


How adorable is she with her sophisticated hair style and posh stance...throw in the daring yellow rain slicker and matching boots with that sassy pink sparkly umbrella and you got a whole lotta moxie!

Supply List:
Papers
Card stock – white, pink, yellow, black
The Paper Studio (chandelier)
Doodlebug (umbrella & accent strip in center) - can't tell from the pic, but it's sparkly
Cream Colored Velum (over yellow on accent strip in the middle)

Stamps
DeNami Design – sending you sunshine sentiment
DeNami Design – Mimi in the rain

Color
Tom Bow markers
Zig metallic marker
Staz-On black

Other
Spellbinder die
Pop dots
Tape runner
Ribbon – Hobby Lobby
Bling – EK (black) & The Paper Studio (yellow)

This challenge was awesome...Thanks Cath for such an exciting time!!!!!!!!!!!!!!!!!!

Embellish Magazine Nautical Challenge -

The wonderful folks over at Embillish Magazine have teamed up with my all time fave stamp company, DeNami Design, to bring us a challenge that is sure to get us in the mood for a beach vacation!


I had a lot of fun coming up with this card. Don’t ya just love a relaxing walk on the beach and picking up pretty sea shells? And just what do we do with all those beautiful shells we collect....we display them in a pretty little bowl of course!

I made a standard card from chocolate card stock and added a layer of maroon card stock. To make the “water” I cut a panel of white card stock and colored it all over with a light blue chalk then went over that with another shade of light blue. To make the “waves” I tore the edge and using the scrap I tore off, just went across the torn edge randomly with turquoise chalk. To make the “sand” I started off with a piece of cream card stock. I inked it all over with a distress ink then using a lightish brown and chocolate brown ink, added the pebble texture. I adhered the “sand” panel then adhered the “water” panel just over lapping the other panel slightly to the card base. I stamped the fish bowl onto a piece of acetate and cut it out then added a little of my sand technique to the very bottom of it. So it wouldn’t be so clear, I placed that little piece of tissue that comes with it back on. I stamped all the shells onto a piece of scrap cream card stock, colored them in and fussy cut them all out. After deciding where to place the bowl, I added a couple of shells “inside” the bowl (between the acetate & tissue layer) and attached it with glue dots. Then I adhered the rest of the shells randomly all over the card (some attached with pop dots). I punched 2 scalloped (haha - a fishy reference!!) circles, stamped my sentiment and added another shell. I finished it all off with a pretty maroon ribbon / bow.

Supplies:

Card stock – white, chocolate, cream & maroon

Color – Tombow markers
              Tim Holtz Linen Distress
              Staz-on Black, Saddle Brown & Timber Brown
              Stampin Up chalk – Bliss Blue, Ballet Blue & Tempting Turquoise

Stamps – DeNami Design #D132 You’re a treasure sentiment
                  DeNami Design #H82 Medium round bowl
                  DeNami Design #PF04 Seashell stamp set
                  Stampin Up – itty bitty backgrounds set


Other – Marvy 1 ½” & 2” scallop punches
               Acetate by Stampendous
              Dollar store ribbon
              Glue dots
              Pop dots
              tape runner


I hope you enjoyed my take on this wonderfully fun theme!!